The following document provides you with information on how to use the Data Sheet Solutions application to conduct a quick and accurate hazardous chemical inventory at your workplace. Your chemical inventory is the foundation of your entire Hazard Communications program, and is the best place to start when reviving an old program or starting from scratch.
The Data Sheets Solutions unique UPC based inventory system increases inventory speed and accuracy. Follow the steps below to conduct your own inventory.
 Step 1. Open your SDS Management Portal and Login
Access your SDS management portal at the custom URL provided to you at sign up. Since we will be conducting our inventory in the field, use a mobile device such as a cell phone or tablet.
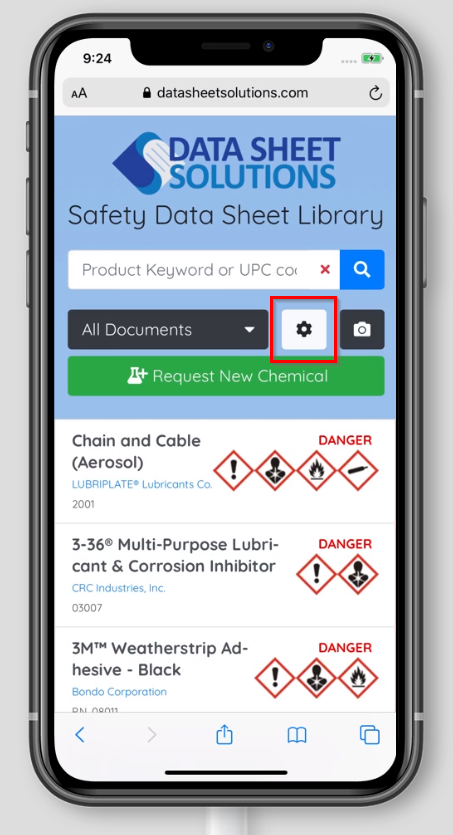
Open the application settings by clicking the white Cog Icon.
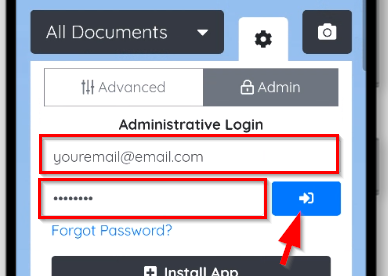
Provide your administrative credentials and click the blue login button to unlock the special admin only functions, to include inventory.
*Inventory Functionality is restricted to administrative users only. If you do not have an administrator account, ask your safety representative to create one. Admin accounts are always free.
Step 2. Activate Inventory Mode
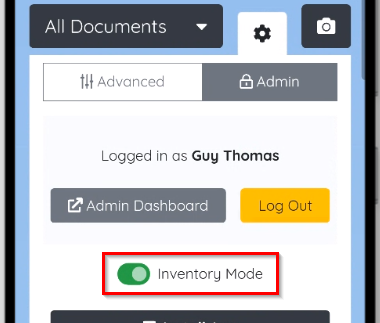
Once you have successfully logged in, the login form will be replaced with a couple of new buttons as well as an “Inventory Mode” slider. Touch the slider icon to initiate your inventory.
Step 3. Set your location
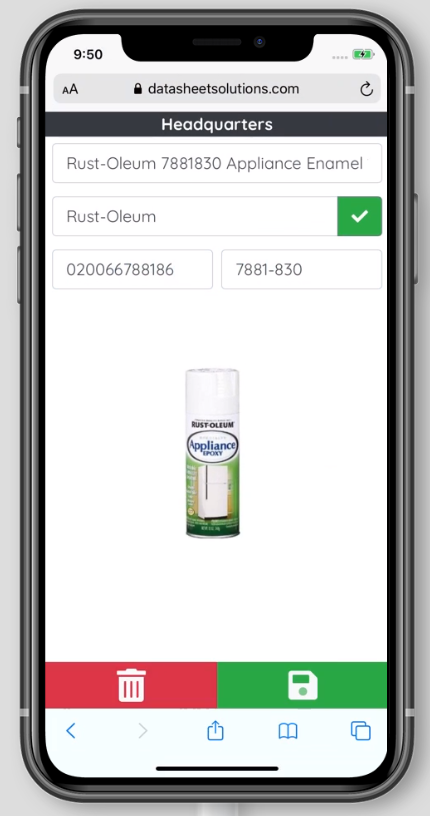
Once you initiate the inventory, you will be sent to the “Add Chemical” screen. This is where you will add the chemicals you find in your work areas. While performing your inventory, you will want to ensure that you have set the appropriate location at the top of the window.
The chemicals you add will automatically be assigned to whatever location is showing at the top of the “Add Chemical” page. To change your current location, touch the button at the top of the screen to reveal all locations available.
Step 4. Add Chemical Details
Use the form in the center of the page to add details for each chemical.
Product Name: Enter the name of the chemical or product here.
Manufacturer Name: Enter the name of the manufacturer or supplier. This information can be found on the back of the chemical in small print as part of the chemical manufacturer address.
Item UPC: This is the 12-digit barcode found on many products. This will automatically be filled when using the UPC scanning functionality. You can also manually enter the information to conduct a UPC search.
Product #: Be sure to add any manufacturer identifiers for the product, like stock number, product number, reorder id, etc. This can often times be the most information information you can collect.
Image: Take a photo of the product to complete your record. To open your camera, tap the grey image icon, or if an existing photo has already been attached, click the photo.
You can manually add this information, or you can use our UPC scanning functionality to look up the details from our UPC database. To open the UPC scanner, touch the blue upc button in the bottom right hand corner of the screen.
The application will request permission to use your camera, be sure to allow, otherwise you will ne unable to use the UPC scanning feature.
The system will evaluate the cameras on your phone or tablet, and attempt to select the appropriate forward facing camera for UPC scanning.
The UPC scanning window features a large camera window for you to place the UPC of the product. The system will automatically search the image for the UPC code. When found, the system will return you to the “Add Chemical” screen.
Camera Troubleshooting: See below for troubleshooting steps and tips
Camera Wont open at all: If the picture from your camera won’t open at all, or if you get an error message it means that your phone or tablet is not allowing our application access to your camera. If you are on an Apple Device, make sure you are using the Safari browser, iOS does not allow camera access to any other web browser. If you previously denied camera access to the application, you will need to re-enable through settings.
Camera Opens, but wont scan UPC: If the camera opens, but will not focus on the barcode, our system may have selected the incorrect camera on your phone or tablet. Use the yellow “Switch Camera” button to choose a different phone camera. If your camera focus is fine, ensure you have a the barcode stripes oriented in the vertical direction. Some metallic barcodes cannot be scanned with your phone, so if you come across a problem barcode, just close the scanner and manually key in the upc.
 Step 5. Use any match suggestions
 Step 5. Use any match suggestions
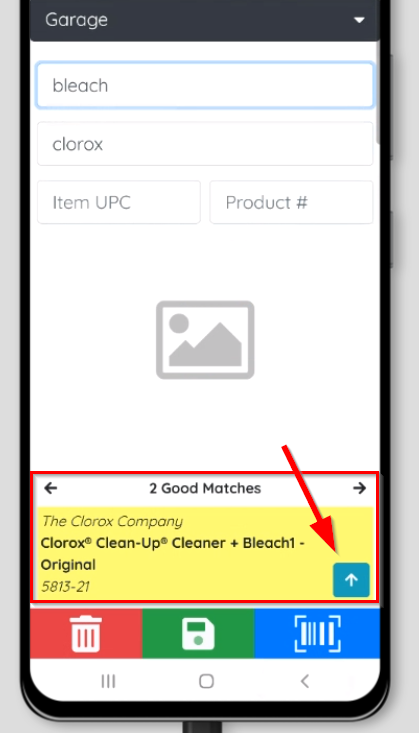
When you scan a upc, or manually enter product information, the system will search your library for any potential duplicates. The search happens automatically, and if a match appears you will be shown the information at the bottom of the screen.
There are 3 types of matches to look for:
Potential Matches: When the system detects a keyword match in only one of the input fields a “potential match” will be generated. These matches will appear grey.
Good Matches: When the system matches a keyword, and the manufacturer, the system will return “good matches”. These will appear yellow.
UPC Matches: When the system matched a UPC code directly with an existing product, the system will automatically load the existing product. You can update the record if needed, or simply save, to add the current location.
When the system returns matches, you can swipe between them to see the details. If you want to load one of the matches into the add chemical form, click the blue Up arrow button.
When you load a match into the “Add Chemical” screen, any changes you make will be saved. This is often used to add photos of chemicals in your library.
Step 6. Save to your Inventory
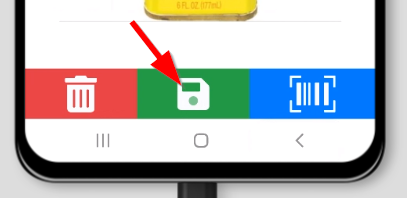
Once you have added a new chemical, or loaded an existing one, you need to click the green save button at the bottom of the screen.
Step 7. Review your inventory
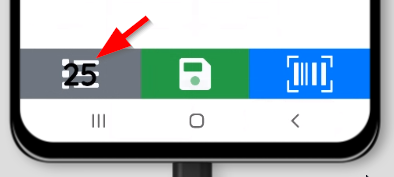
You can review the items you have inventories by clicking the grey “Inventory List” button in the bottom left hand side of the screen.
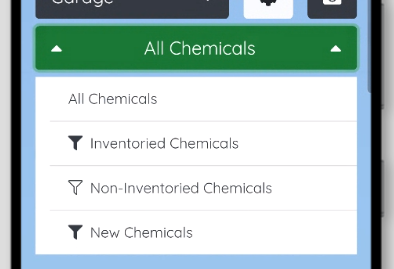
The inventory list will show you details of chemicals assigned to the currently selected location. You can configure the list using the following filters:
All Chemicals: This filter will show all chemicals currently assigned to the selected location.
Inventoried Chemicals: This filter will configure the list to show all chemicals inventoried at the selected location.
Non-Inventoried Chemicals: This filter will show you any chemicals assigned to the current location, but not yet inventoried there.
New Chemicals: This filter will show you chemicals that have been recently added to the current location (Added after the currently configure inventory start date)
The inventory list provides you to access to several editing functions for the chemicals in your inventory. The edit button is shown in the bottom right hand corner of each chemical. You can use the edit button to update any chemical properties previously entered.
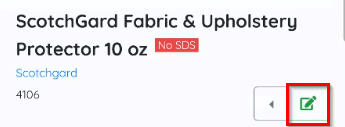
Adjacent to the edit button is the more actions button. Click the left arrow to reveal the other options available for that particular location.
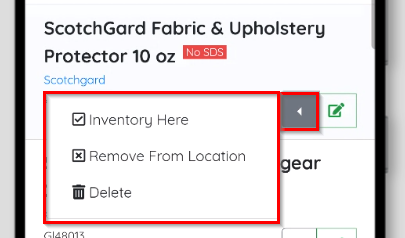
Inventory Here: Mark this chemical as “inventoried” at the currently selected location.
Remove From Location: Disconnect this chemical from the currently selected location.
Archive: Move the chemical into the archive.
Delete: Delete the chemical record completely.
This completes the basics of the inventory application. Once you have completed your inventory, you will move onto the next step, adding your SDS documents.